This is a step-by-step guide to installing the HEX ezCAN Daytona on compatible Harley-Davidson models.
IMPORTANT: This installation guide is only applicable to the Harley-Davidson motorcycle models listed below. If you want to install a HEX ezCAN on a Harley-Davidson Pan America 1250, refer to the installation page for HEX ezCAN Laconia for Harley-Davidson.
This installation guide covers the following bikes:
The HEX ezCAN Daytona is compatible with a wide range of Harley-Davidson series manufactured between 2011 and 2023. In general, earlier models are equipped with a grey-coloured Deutsch-type diagnostic connector, while later models are equipped with a red-coloured Euro-5 type diagnostic connector.
You can browse detailed information on ezCAN Daytona compatibility with Harley-Davidson models below.
HEX ezCAN installation kit contents:
Softail models (2011-2023)
Sportster models (2014-2021)
Dyna models (2012-2023)
Trike models (2014-2021)
Touring models (2014-2021)

Touring models (2021-2023)
Trike models (2021-2023)


This installation guide covers the following bikes:
HEX ezCAN installation kit contents (prior to April 2024):
Softail models (2011-2023)
Sportster models (2014-2021)
Dyna models (2012-2023)
Trike models (2014-2021)
Touring models (2014-2021)

Touring models (2021-2023)
Trike models (2021-2023)
The HEX ezCAN Daytona is compatible with a wide range of Harley-Davidson series manufactured between 2011 and 2023. In general, earlier models are equipped with a grey-coloured Deutsch-type diagnostic connector, while later models are equipped with a red-coloured Euro-5 type diagnostic connector.
You can browse detailed information on ezCAN Daytona compatibility with Harley-Davidson models below.


This is a good time to:
Diagnostic connector types
Depending on year model, two different diagnostic connector types are used on HEX ezCAN Daytona-compatible Harley-Davidsons:
The six-pin male Deutsch-type diagnostic connector used on earlier Harley-Davidson models looks like this:
The Euro 5-type diagnostic connector used on later Harley-Davidson models looks like this:
IMPORTANT: Do not connect the HEX ezCAN’s CAN-bus connector to any part of the motorcycle other than the diagnostic connector. If you do, the ezCAN will not function.
Route both HEX ezCAN power supply cables from the main body location to the battery.
Ensure that all wiring is routed safely and securely, in a way that does not allow it to chafe or pinch. Where needed, secure all wiring to frame tubes or other components using the cable ties supplied with the HEX ezCAN installation kit.
WARNING: For safety reasons, always disconnect the negative battery terminal first, and re-connect it last.
Note: The HEX ezCAN’s status LED should be solid green for approximately a minute after connection to the battery. After this time, the HEX ezCAN enters Sleep Mode, and there will be no LED activity until the bike’s ignition is switched ON.
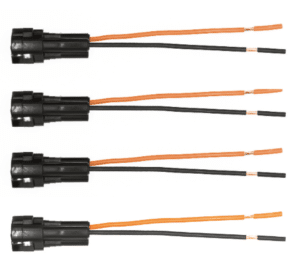
The HEX ezCAN installation kit includes four two-wire stub connectors with male connection terminals, orange power wires and black ground wires.
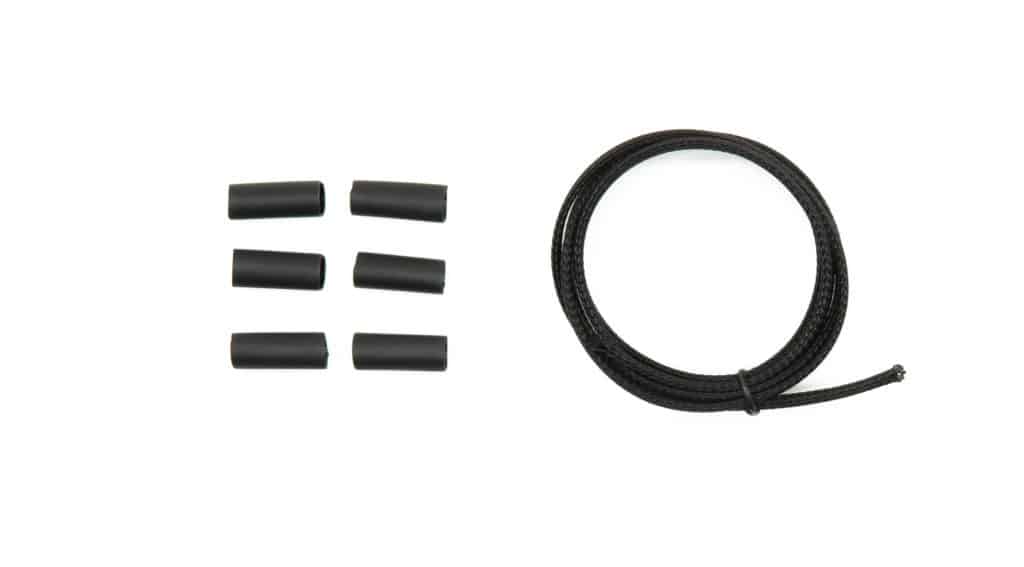
The following parts are also included:
If the accessory to be connected to a power circuit has three wires, convert a two-wire stub connector to a three-wire connector as shown in the Connecting 3-wire LED lights section of the HEX ezCAN User Manual (downloadable from here).
If the accessory to be connected to a power circuit has two wires, seal the stub connector’s empty terminal cavity as shown in the Connecting 2-wire accessories section of the HEX ezCAN User Manual.
If any of the HEX ezCAN’s power circuits will not be used, we recommend that you connect a blanking plug to the output plug of each unused circuit.
2-wire applications: insert a blanking seal.
3-wire applications: insert a PWM terminal wire.
IMPORTANT: If the stub connectors included in your HEX ezCAN installation kit do not have orange power wires, but instead have colours that match the colouring of the HEX ezCAN power circuits (as seen below), always connect like-to-like (red stub connector to red power circuit, blue stub connector to blue power circuit, and so on.)
Connect the male terminal of each stub connector to the relevant female HEX ezCAN power circuit connector (below).
Connecting a 2-wire accessory to a HEX ezCAN stub connector:
Connecting a 3-wire accessory to a HEX ezCAN stub connector:
Connecting low-power smart accessories to a power circuit:
If you are installing ‘smart’ accessories (that is, low-power accessories capable of intelligent input and control through the HEX ezCAN’s LIN bus), note the following:
Read the HEX ezBUS and Configuring HEX ezBUS functionality sections of the ezCAN user manual (downloadable from here) for detailed information on how to use ezBUS functionality.
Note that if the white circuit is set to ezBUS mode, its fuse trip limit is set to 15 Amps by default. If needed, ezBUS PWR functionality can be used to increase the white circuit’s current capacity to a maximum of 30 Amps in ezBUS mode. See the relevant section of the HEX ezCAN User Manual for details.
The HEX ezCAN Extension Kit contains everything you need to connect front auxiliary lights, rear accessory lights and a horn to the HEX ezCAN. It also includes additional connectors that allow you to connect other accessories.
WARNING: Test and check your installations and accessories in a safe, controlled environment before first use. Caution is advised at all times. Extra vigilance is needed when testing new features or accessories. You do so at your own risk.
DISCLAIMER: HEX Innovate is not liable for any injury or damage, howsoever caused, and all products and services are used at your own risk.
Before finalizing the HEX ezCAN installation or re-installing any components you may have removed, it is important that you test all newly installed accessories for satisfactory fitment and correct operation.
Many HEX ezCAN-powered accessories can be tested by switching the ignition ON and operating the relevant controls. Exceptions include:
Complete the HEX ezCAN installation as follows:
You will now be redirected to our primary website to view our Privacy Policy
You will now be redirected to our primary website to view our Legal Information