HEX ezCAN Installatiehandleiding

HEX ezCAN PURE and generic input harness

This is a step-by-step guide to installing the HEX ezCAN PURE, and its generic input harness, on any compatible motorcycle.
As an alternative to reading this section, you can watch the video below for general instructions on how to install the HEX ezCAN PURE and its included generic input harness.

If you would like to see an installation case study of a HEX ezCAN PURE, its generic input harness, and typical accessories instead, click here.

HEX ezCAN PURE packaging:

Inhoud van de HEX ezCAN-installatiekit:

  • 1x HEX ezCAN PURE device (Impact-absorbent grey/black body, white 6-pin JWPF connector)
  • 1x generic control input harness kit, including:
    • 1x 1.8m 6-wire generic control input harness with input wires for Ignition, High beam, Horn, Left & Right turn signal, and Brake inputs
    • 4m thicker protective braid
    • 4m thinner protective braid
    • 1x thicker, longer section of adhesive heatshrink tubing
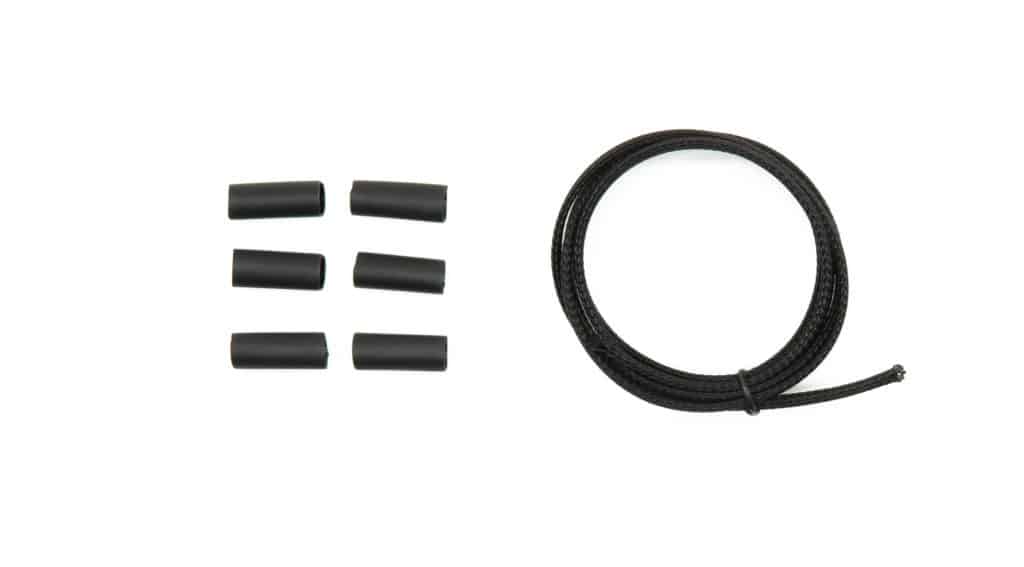
    • 4x short sections of adhesive heatshrink tubing
    • 6x Posi-taps
  • 1x USB C-to-USB C cable with included USB C-to-USB A adaptor
  • 4x rubberen afdichtingen
  • 3x stekkers voor het uitschakelen van stroomcircuits
  • 20x kabelbinders
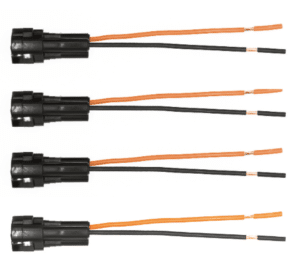
  • 4x 2-draads stubconnectoren (zwarte/oranje bedrading)
  • 4x 1-draads aansluitdraden (oranje)
Video afspelen

STAP 1:

Things to know before you start

The HEX ezCAN PURE is specifically designed for vehicles not featuring CAN-bus systems that are compatible with regular HEX ezCANs. Instead, the HEX ezCAN PURE reads 12-volt control inputs from the electrical cables supplying power to the bike’s lights, horn, and ignition power.

This page shows you how to install a HEX ezCAN PURE and its included generic input harness.
Most steps are applicable to nearly all motorcycles. Only the input harness tap points, and routes taken by wiring, may differ.

STAP 2:

De software downloaden, installeren en configureren

Dit is een goed moment om:

  • Unbox the HEX ezCAN PURE.
  • Bepaal welke en hoeveel accessoires u gaat installeren, en wat de vereisten daarvoor zijn. Moeten sommige accessoires op een specifieke manier en/of op specifieke stroomcircuits worden aangesloten? Zo moeten 'slimme' accessoires met een laag vermogen doorgaans op het ezBUS (witte) stroomcircuit worden geïnstalleerd.
  • Lees het gedeelte 'Installeren voor het leven' van de HEX ezCAN-gebruikershandleiding (hier te downloaden) en evalueer uw geplande installatie aan de hand van de richtlijnen in dat gedeelte.
  • Register your HEX ezCAN PURE (All you need to do to register the ezCAN PURE is connect it to your computer using the supplied USB cable, meaning you can do it at the comfort of your desk.)

STAP 3:

Gather your tools

As well as the tools you will need to remove and re-install all components necessary to access input tap points, you will need the following:

  • An electronic multimeter capable of readings on the 20 VDC scale.
  • Side-cutters or sidecutting pliers.
  • A focused heat source, such as a heat gun. A cigarette lighter will also work.
  • Your vehicle’s electrical circuit diagrams (optional).

STAP 4:

Locate your vehicle's battery

The HEX ezCAN PURE’s power wires are long enough to give you a generous margin during installation.

As a general rule, the location of the vehicle’s battery will determine where you install the HEX ezCAN PURE. Remember that while the location of the battery cannot be changed, the location of the HEX ezCAN PURE can be.

With the location of the battery in mind, find an optimal place to install the HEX ezCAN PURE. This should be a place on the vehicle where the HEX ezCAN PURE’s:

  • Main fuse can easily be reached, and the status LED can be easily seen.
  • Main body is protected from overheating, crushing, impacts, abrasion, vibration, and water spray.
  • Wiring is kept well clear of moving components (such as fork stanchions, steering triple clamps and swingarms), and is not in danger of being cut, abraded or overheated.

STAP 5:

Determine the control signals

IMPORTANT: Only follow the instructions in this section if you intend to use the generic input harness supplied with the HEX ezCAN PURE.
If you intend to use an optional plug-&-play input harness for your specific model instead, click here for installation instructions.

If you have the vehicle’s electrical circuit diagrams, refer to them before installing the input harness. Doing so will make locating the correct control input tap points much easier. Circuit diagrams are usually included in the manufacturer’s workshop manual for the vehicle. Alternatively, you can find the circuit diagrams in the relevant Haynes workshop manual or Clymer workshop manual for the vehicle.

CAUTION: If your vehicle has a fuel-injection system, do not tap into the fuel-injection system’s sensor wiring. Doing so could cause the fuel-injection system to malfunction.

Before connecting any input harness wires to the vehicle’s wiring, use a multimeter set to the 20 VDC scale to verify that the vehicle circuit you want to tap behaves only in a way that is expected. Our recommendation is to locate signal sources for all six control signals, and connect to them. Ignition is the HEX ezCAN PURE’s only compulsory signal input, and any or all other signal inputs can be used as needed. Howver, even if you don’t need all the inputs right away, connecting to all six will make it easier to add functions and outputs later.

In all cases below, you will connect the relevant wire on the HEX ezCAN’s generic input harness to the positive wire on the relevant vehicle circuit.

Keep in mind that without an ignition signal, the HEX ezCAN PURE cannot be activated.
There are a number of ways to connect to an ignition signal:

  • The vehicle’s headlight connector normally has a voltage signal that is approximately equal to Battery voltage when the ignition is switched on. Keep in mind that there may be more than one ignition signal. If so, one of them may be switched through the vehicle’s headlight relay, meaning power to it may be shut off whenever the engine is started.
  • Another suitable place to source an ignition signal is from the vehicle’s rear running/brake light. On most modern vehicles, the rear running light always goes on when the ignition is switched on.

To do this, trace wires back from the headlight’s high beam source.
Most high beam signals will change from 0V to approximately battery voltage when the high beam is active. However, note the following exceptions:

  • High beam voltage may change from a higher value to around 0V when the high beam is active, and/or
  • The difference between the high beam’s off-state voltage and on-state voltage may be less than 12 volts.

To do this, trace wires back from the tail/brake light’s brake light source.

Identify the Turn signal sources for both left and right.
On vehicles with turn signals, there are options at the front and rear of the vehicle.

 Do this as follows:

  1. Raak met de negatieve (zwarte) sonde van uw multimeter de negatieve pool van de accu aan.
  2. Touch the positive (red) probe to one horn terminal, then the other horn terminal, while pressing the horn button.
  3. The wire to which you should connect the HORN input wire will be connected to the horn terminal whose voltage changes whenever the Horn is active. Note that the voltage change could be from approximately 0V to approximately battery voltage, or from approximately battery voltage to approximately 0V.


Note:
Some horns only have one wire, with the horn grounding/earthing at its mounting point. In these cases, connect the HORN input wire on the generic input harness to the vehicle’s horn power wire.

STAP 6:

Assemble the included generic input harness

IMPORTANT: Only follow the instructions in this section if you intend to use the generic input harness supplied with the HEX ezCAN PURE.
If you intend to use an optional plug-&-play input harness for your specific model instead, click here for installation instructions.

To see a video on how to assemble the generic input harness included in the HEX ezCAN PURE kit, play the video below.

STAP 7:

Posi-Tap the input wires to the vehicle wires

IMPORTANT: Only follow the instructions in this section if you intend to use the generic input harness supplied with the HEX ezCAN PURE.
If you intend to use an optional plug-&-play input harness for your specific model instead, click here for installation instructions.

1. Connect each wire of the generic input harness to your chosen points on the vehicle’s wiring, using the Posi-taps included in the kit.
To see a video on how to use Posi-taps, click Play below.

2. Connect the input harness to the HEX ezCAN PURE’s 6-pin JWPF connector.

STAP 8:

Connecting intelligent HEX controllers

If you will not be connecting an intelligent controller made by HEX (such as an ezSWITCH) to the HEX ezCAN PURE, prevent dirt and water from entering the 3-pin JWPF connector by sealing the end of the connector with electrical insulation tape (right).

STAP 9:

Connect the HEX ezCAN PURE to the vehicle's battery

Make sure all wiring is routed safely and securely, in a way that does not allow it to chafe or pinch. Where needed, secure all wiring to frame tubes or other components using the cable ties supplied with the HEX ezCAN installation kit.

WARNING: For safety reasons, always disconnect the negative battery terminal first, and re-connect it last.

  1. Koppel de negatieve kabelboomterminal los van de negatieve accupool.
  2. Koppel de positieve kabelboomterminal los van de positieve accupool.
  3. If needed, open the rubber lid of the HEX ezCAN PURE’s main fuse housing, and temporarily remove the fuse. This will make it easier to route the power cables and fuse housing through any tight spaces.
  4. Route both HEX ezCAN power supply cables toward the battery from the ezCAN’s main body.
  5. Connect the terminal on the orange ezCAN power cable, along with the bike’s positive wiring harness terminal, to the positive battery pole. Do not fasten the terminal at this time.
  6. Connect the terminal on the brown ezCAN power cable, along with the bike’s negative wiring harness terminal, to the negative battery pole. Do not fasten the terminal at this time.
  7. If the HEX ezCAN’s main fuse was removed from the fuse holder, re-install the fuse and close the rubber lid of the fuse housing.
  8. Make sure both the battery cables are optimally positioned for final fitment.
  9. Tighten the negative and positive battery terminals.
  10. Starting at the location of the battery, secure the ezCAN’s battery cables using cable ties.
  11. Secure the remaining length of the ezCAN battery cables using cable ties, following the battery cables back toward the main body of the HEX ezCAN PURE.


Note:
The HEX ezCAN PURE’s status LED should be solid green for approximately a minute after connection to the battery. After this time, the HEX ezCAN PURE enters Sleep Mode, and there will be no LED activity until the vehicle’s ignition is switched ON.

STEP 10:

Sluit de accessoires aan met behulp van de kleurcodering.

De HEX ezCAN-installatiekit bevat vier tweedraads stubconnectoren met mannelijke aansluitklemmen, oranje stroomdraden en zwarte aardingsdraden.

De volgende onderdelen zijn ook inbegrepen:

  • 4x pulsbreedtemodulatie (PWM) aansluitdraden (oranje met witte markering)
  • 4x rubberen afdichtingen


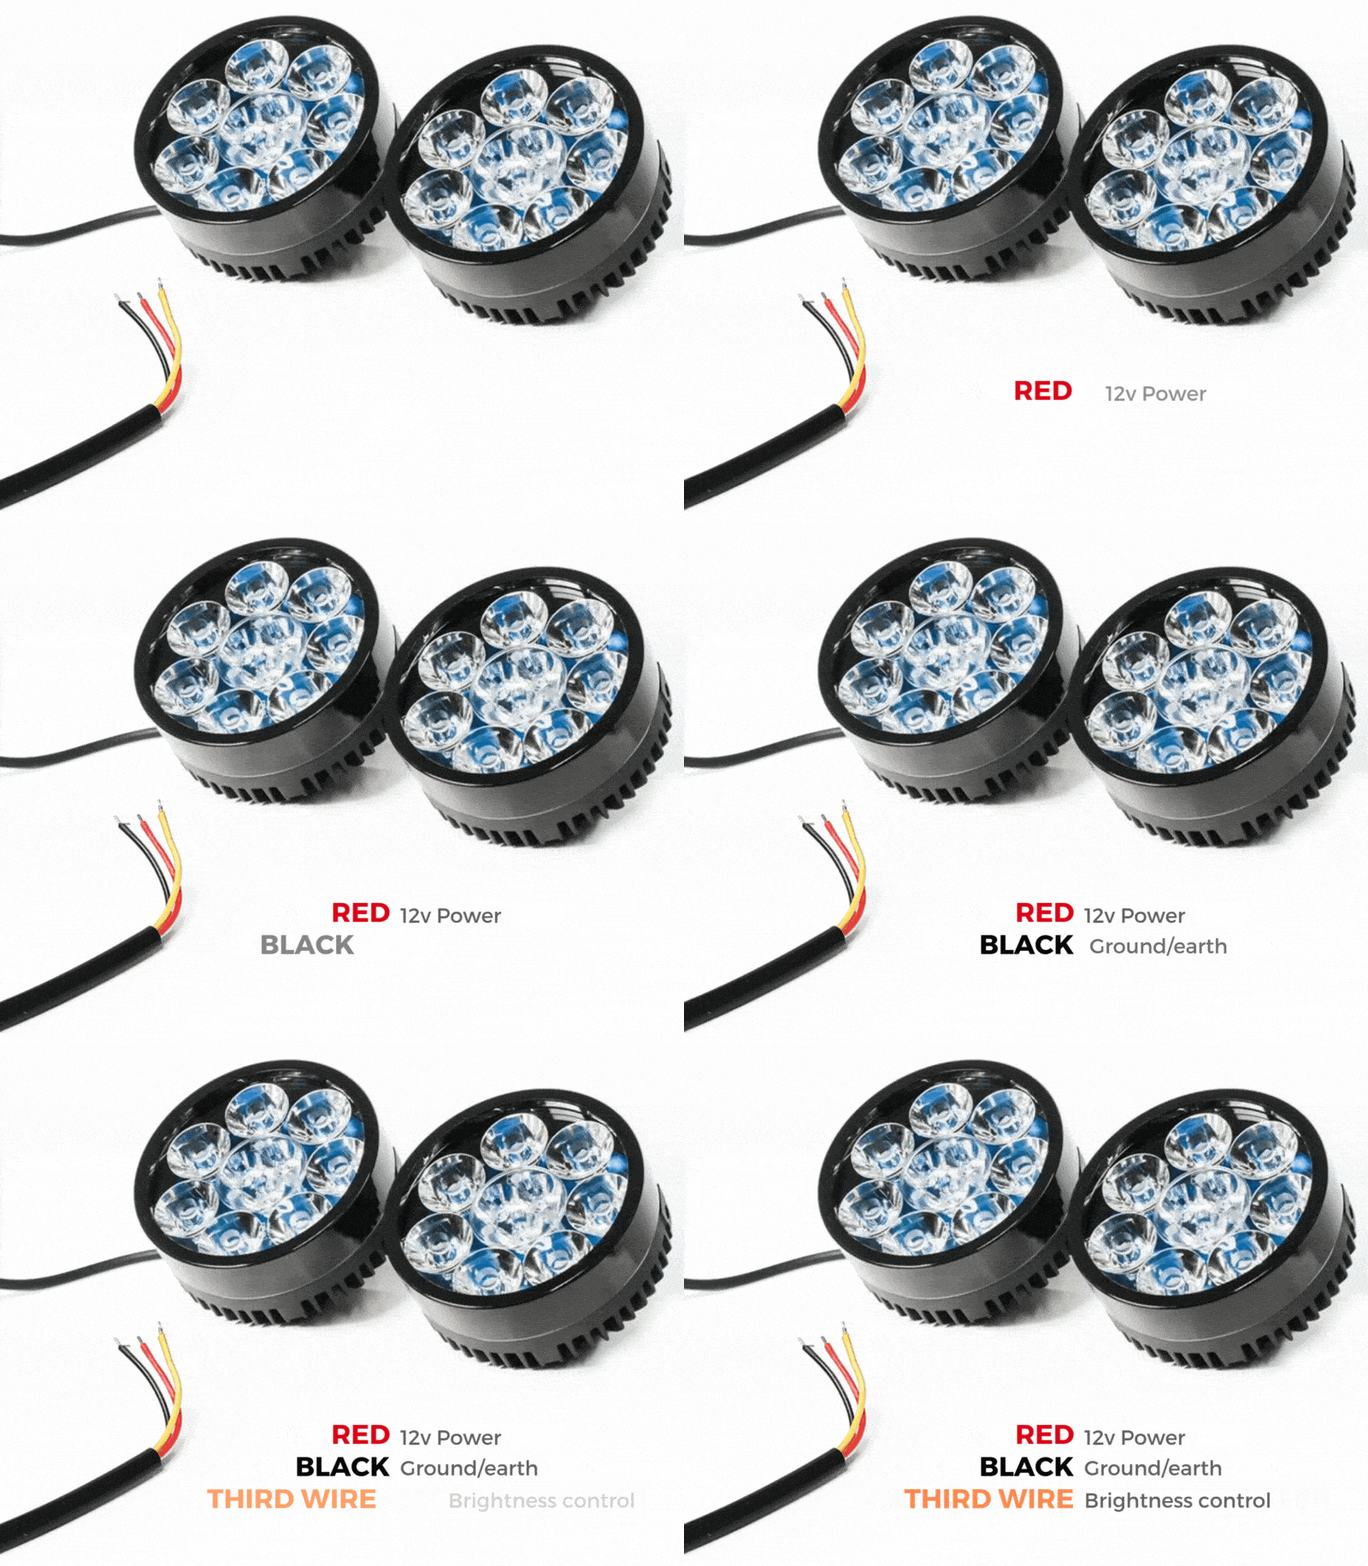
Als het accessoire dat op een stroomcircuit moet worden aangesloten drie draden heeft, moet u een tweedraads stekker ombouwen naar een driedraads stekker, zoals weergegeven in het gedeelte 'Aansluiten van 3-draads LED-lampen' van de HEX ezCAN-gebruikershandleiding (hier te downloaden).

Als het accessoire dat op een stroomcircuit moet worden aangesloten twee draden heeft, dicht dan de lege aansluitingsholte van de stubconnector af zoals weergegeven in het gedeelte '2-draads accessoires aansluiten' van de HEX ezCAN-gebruikershandleiding.

Als een van de stroomcircuits van de HEX ezCAN niet wordt gebruikt, raden we u aan een afdichtplug aan te sluiten op de uitgangsplug van elk ongebruikt circuit.

2-wire applications: insert a blanking seal.
3-wire applications: insert a PWM terminal wire.


4 x aansluitdraden en afdichtingsringen
4 x tweedraads stubconnectoren

Sluit de mannelijke aansluiting van elke stubconnector aan op de relevante vrouwelijke HEX ezCAN-voedingscircuitconnector (zie hieronder).

Een 2-draads accessoire aansluiten op een HEX ezCAN-stubconnector:

  1. Sluit de aardingsdraad van het accessoire (deze is meestal, maar niet altijd zwart of bruin) aan op de aardingsdraad van een HEX ezCAN-stubconnector.
  2. Sluit de voedingskabel van het accessoire (deze is meestal, maar niet altijd rood) aan op de 12V-voedingskabel van een HEX ezCAN-stubconnector.


Een 3-draads accessoire aansluiten op een HEX ezCAN-stubconnector:

  1. Sluit de aardingsdraad en de stroomdraad van het accessoire aan zoals hierboven beschreven.
  2. Sluit de PWM-stuurdraad van het accessoire aan op de tweekleurige (effen kleur + tracer) draad van een HEX ezCAN-stubconnector.

Slimme accessoires met laag stroomverbruik aansluiten op een stroomcircuit:

Als u 'slimme' accessoires installeert (dat wil zeggen accessoires met een laag stroomverbruik die intelligente invoer en besturing via de LIN-bus van de HEX ezCAN mogelijk maken), houd dan rekening met het volgende:

  1. Slimme accessoires (waaronder de HEX ezSWITCH) mogen alleen worden aangesloten op het ezBUS-stroomcircuit (wit) van de HEX ezCAN. Slimme accessoires werken niet als ze worden aangesloten op de rode, gele of blauwe circuits.
  2. Het ezBUS (wit) stroomcircuit kan een willekeurig aantal individuele accessoires aan, met een maximum van vijftien.
  3. Er is een selectie van HEX ezBUS-adapters en -connectoren beschikbaar, waarmee u slimme accessoires snel en eenvoudig kunt aansluiten. Zie het gedeelte ezBUS-accessoires van de HEX Innovate online winkel voor meer informatie.

Lees de secties HEX ezBUS en Configureren van HEX ezBUS-functionaliteit in de HEX ezCAN-gebruikershandleiding (hier te downloaden) voor gedetailleerde informatie over het gebruik van de ezBUS-functionaliteit.

IMPORTANT: if the white circuit is set to ezBUS mode, its fuse trip limit is set to 15 Amps by default. If needed, the ezBUS PWR function can be used to increase the white circuit’s current capacity to a maximum of 30 Amps in ezBUS mode. See the relevant section of the HEX ezCAN User Manual (downloadable from here) for details.

BELANGRIJK: Als de accessoire-stubconnectoren in uw HEX ezCAN-installatiekit geen oranje voedingsdraden hebben, maar in plaats daarvan kleuren hebben die overeenkomen met de kleuren van de ezCAN-voedingscircuits (zoals hieronder weergegeven), sluit u altijd gelijksoortige connectoren aan (rode stubconnector op rood voedingscircuit, blauwe stubconnector op blauw voedingscircuit, enzovoort).

EENVOUDIGERE INSTALLATIE MET DE HEX ezCAN-UITBREIDINGSKIT

De HEX ezCAN-uitbreidingsset bevat alles wat u nodig hebt om voorste extra verlichting, achterste accessoireverlichting en een claxon aan te sluiten op de HEX ezCAN. De set bevat ook extra connectoren waarmee u andere accessoires kunt aansluiten.

U kunt de verlengkabelkit hier kopen.


  • 2x 1,5 m 3-aderige verlengkabels (meestal gebruikt voor 2-draads of 3-draads extra koplampen)
  • 1x 0,5 m 3-aderige verlengkabel (meestal gebruikt voor een achterlicht/remlicht)
  • 1x 1,5 m 2-aderige verlengkabel, met vorkstekkers (meestal gebruikt voor het aansluiten van luchthoorns of andere 2-draads accessoires)
  • 3x vrouwelijke MT-3-connectoren, inclusief aansluitpinnen en aansluitingenafdichtingen
  • 5x mannelijke MT-3-connectorenset, inclusief aansluitpinnen en aansluitingenafdichtingen
  • 5x rubberen afdichtingen (gebruikt in gevallen waarin slechts twee aansluitingen worden gebruikt in een 3-draads MT-3-connector)
  • 6x 20 mm stukken krimpkous met lijmlaag
  • 2x 6,3 mm vrouwelijke vorkconnector-aansluitingen
  • 1 m kabelmantel
Verlengstukken voor extra koplampen aan de voorkant
Hoornverlenging
Krimpfolie met kleeflaag en 1 m mantel
Rem/Accessoire-verlenging

STEP 11:

Good housekeeping

Tidy the input harness, accessory wiring and battery cable routing, making sure you have easy access to the four power circuit plugs.

Zet alle losse kabels vast met de kabelbinders die bij de HEX ezCAN-installatiekit zitten.

STEP 12:

Voltooi de installatie

Voltooi de installatie van HEX ezCAN als volgt:

  1. Zorg ervoor dat het hoofdgedeelte van de HEX ezCAN goed is bevestigd op een plek waar het beschermd is tegen druk, hitte en schokken.
  2. Zorg ervoor dat alle fabrieks-, HEX ezCAN- en accessoirekabels en kabelbomen ruimschoots uit de buurt van alle bewegende onderdelen blijven en stevig zijn bevestigd. Gebruik waar nodig de kabelbinders die bij de HEX ezCAN-installatiekit zijn meegeleverd.
  3. Vervang alle motorfietsonderdelen en bevestigingsmiddelen die mogelijk zijn verwijderd voor de installatie van de HEX ezCAN.
  4. Controleer de volledige installatie op fouten of problemen en los alle geconstateerde problemen op.
  5. Download de HEX ezCAN-gebruikershandleiding vanaf deze pagina. Bewaar de handleiding op een veilige plek op uw computer of telefoon: deze bevat alle informatie die u nodig hebt om de HEX ezCAN te bedienen en de functionaliteit ervan aan te passen.

STEP 13:

Adjust input values and do configuration

To be able to operate the HEX ezCAN PURE and connected accessories in the way you want to, you must now adjust the input circuit parameters, and device configuration settings.

To learn how to do this, see the HEX ezCAN PURE Device Configuration page.

STEP 14:

Test de installatie

WAARSCHUWING: Test en controleer uw installaties en accessoires in een veilige, gecontroleerde omgeving voordat u ze voor het eerst gebruikt. Wees altijd voorzichtig. Wees extra waakzaam wanneer u nieuwe functies of accessoires test. U doet dit op eigen risico.

DISCLAIMER: HEX Innovate is niet aansprakelijk voor enig letsel of schade, hoe dan ook veroorzaakt, en alle producten en diensten worden op eigen risico gebruikt.

Before finalizing the HEX ezCAN PURE installation, or re-installing any components you may have removed, it is important that you test all newly installed accessories for satisfactory fitment and correct operation.

Many HEX ezCAN PURE-powered accessories can be tested by switching the ignition ON and operating the relevant controls. Exceptions include accessories for which you have enabled the Only on when engine running feature (examples may include Aux 1 lights, Aux 2 lights, MotoLights, and heated clothing). To test these functions, the bike’s engine must be running.

Let op!

U wordt nu doorgestuurd naar onze primaire website om ons privacybeleid te bekijken.

Let op!

U wordt nu doorgestuurd naar onze primaire website om onze juridische informatie te bekijken.

Let op!

U wordt nu doorgestuurd naar onze primaire website om onze juridische informatie te bekijken.