This is a step-by-step guide to installing the HEX ezCAN PURE, and its generic input harness, on any compatible motorcycle.
As an alternative to reading this section, you can watch the video below for general instructions on how to install the HEX ezCAN PURE and its included generic input harness.
If you would like to see an installation case study of a HEX ezCAN PURE, its generic input harness, and typical accessories instead, click here.
Contenido del kit de instalación HEX ezCAN:
The HEX ezCAN PURE is specifically designed for vehicles not featuring CAN-bus systems that are compatible with regular HEX ezCANs. Instead, the HEX ezCAN PURE reads 12-volt control inputs from the electrical cables supplying power to the bike’s lights, horn, and ignition power.
This page shows you how to install a HEX ezCAN PURE and its included generic input harness.
Most steps are applicable to nearly all motorcycles. Only the input harness tap points, and routes taken by wiring, may differ.
Este es un buen momento para:
As well as the tools you will need to remove and re-install all components necessary to access input tap points, you will need the following:
The HEX ezCAN PURE’s power wires are long enough to give you a generous margin during installation.
As a general rule, the location of the vehicle’s battery will determine where you install the HEX ezCAN PURE. Remember that while the location of the battery cannot be changed, the location of the HEX ezCAN PURE can be.
With the location of the battery in mind, find an optimal place to install the HEX ezCAN PURE. This should be a place on the vehicle where the HEX ezCAN PURE’s:
IMPORTANT: Only follow the instructions in this section if you intend to use the generic input harness supplied with the HEX ezCAN PURE.
If you intend to use an optional plug-&-play input harness for your specific model instead, click here for installation instructions.
If you have the vehicle’s electrical circuit diagrams, refer to them before installing the input harness. Doing so will make locating the correct control input tap points much easier. Circuit diagrams are usually included in the manufacturer’s workshop manual for the vehicle. Alternatively, you can find the circuit diagrams in the relevant Haynes workshop manual or Clymer workshop manual for the vehicle.
CAUTION: If your vehicle has a fuel-injection system, do not tap into the fuel-injection system’s sensor wiring. Doing so could cause the fuel-injection system to malfunction.
Before connecting any input harness wires to the vehicle’s wiring, use a multimeter set to the 20 VDC scale to verify that the vehicle circuit you want to tap behaves only in a way that is expected. Our recommendation is to locate signal sources for all six control signals, and connect to them. Ignition is the HEX ezCAN PURE’s only compulsory signal input, and any or all other signal inputs can be used as needed. Howver, even if you don’t need all the inputs right away, connecting to all six will make it easier to add functions and outputs later.
In all cases below, you will connect the relevant wire on the HEX ezCAN’s generic input harness to the positive wire on the relevant vehicle circuit.
Keep in mind that without an ignition signal, the HEX ezCAN PURE cannot be activated.
There are a number of ways to connect to an ignition signal:
To do this, trace wires back from the headlight’s high beam source.
Most high beam signals will change from 0V to approximately battery voltage when the high beam is active. However, note the following exceptions:
To do this, trace wires back from the tail/brake light’s brake light source.
Identify the Turn signal sources for both left and right.
On vehicles with turn signals, there are options at the front and rear of the vehicle.
Do this as follows:
Note: Some horns only have one wire, with the horn grounding/earthing at its mounting point. In these cases, connect the HORN input wire on the generic input harness to the vehicle’s horn power wire.
IMPORTANT: Only follow the instructions in this section if you intend to use the generic input harness supplied with the HEX ezCAN PURE.
If you intend to use an optional plug-&-play input harness for your specific model instead, click here for installation instructions.
To see a video on how to assemble the generic input harness included in the HEX ezCAN PURE kit, play the video below.
IMPORTANT: Only follow the instructions in this section if you intend to use the generic input harness supplied with the HEX ezCAN PURE.
If you intend to use an optional plug-&-play input harness for your specific model instead, click here for installation instructions.
1. Connect each wire of the generic input harness to your chosen points on the vehicle’s wiring, using the Posi-taps included in the kit.
To see a video on how to use Posi-taps, click Play below.
2. Connect the input harness to the HEX ezCAN PURE’s 6-pin JWPF connector.
If you will not be connecting an intelligent controller made by HEX (such as an ezSWITCH) to the HEX ezCAN PURE, prevent dirt and water from entering the 3-pin JWPF connector by sealing the end of the connector with electrical insulation tape (right).
Make sure all wiring is routed safely and securely, in a way that does not allow it to chafe or pinch. Where needed, secure all wiring to frame tubes or other components using the cable ties supplied with the HEX ezCAN installation kit.
WARNING: For safety reasons, always disconnect the negative battery terminal first, and re-connect it last.
Note: The HEX ezCAN PURE’s status LED should be solid green for approximately a minute after connection to the battery. After this time, the HEX ezCAN PURE enters Sleep Mode, and there will be no LED activity until the vehicle’s ignition is switched ON.
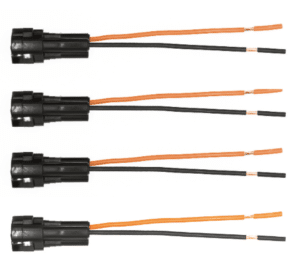
El kit de instalación HEX ezCAN incluye cuatro conectores de dos cables con terminales de conexión macho, cables de alimentación naranjas y cables de tierra negros.
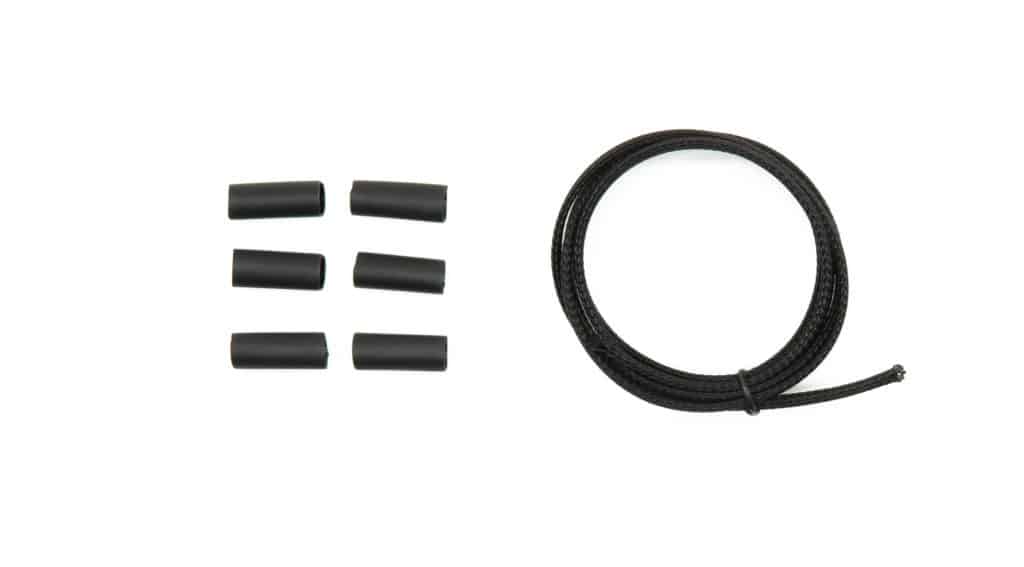
También se incluyen las siguientes piezas:
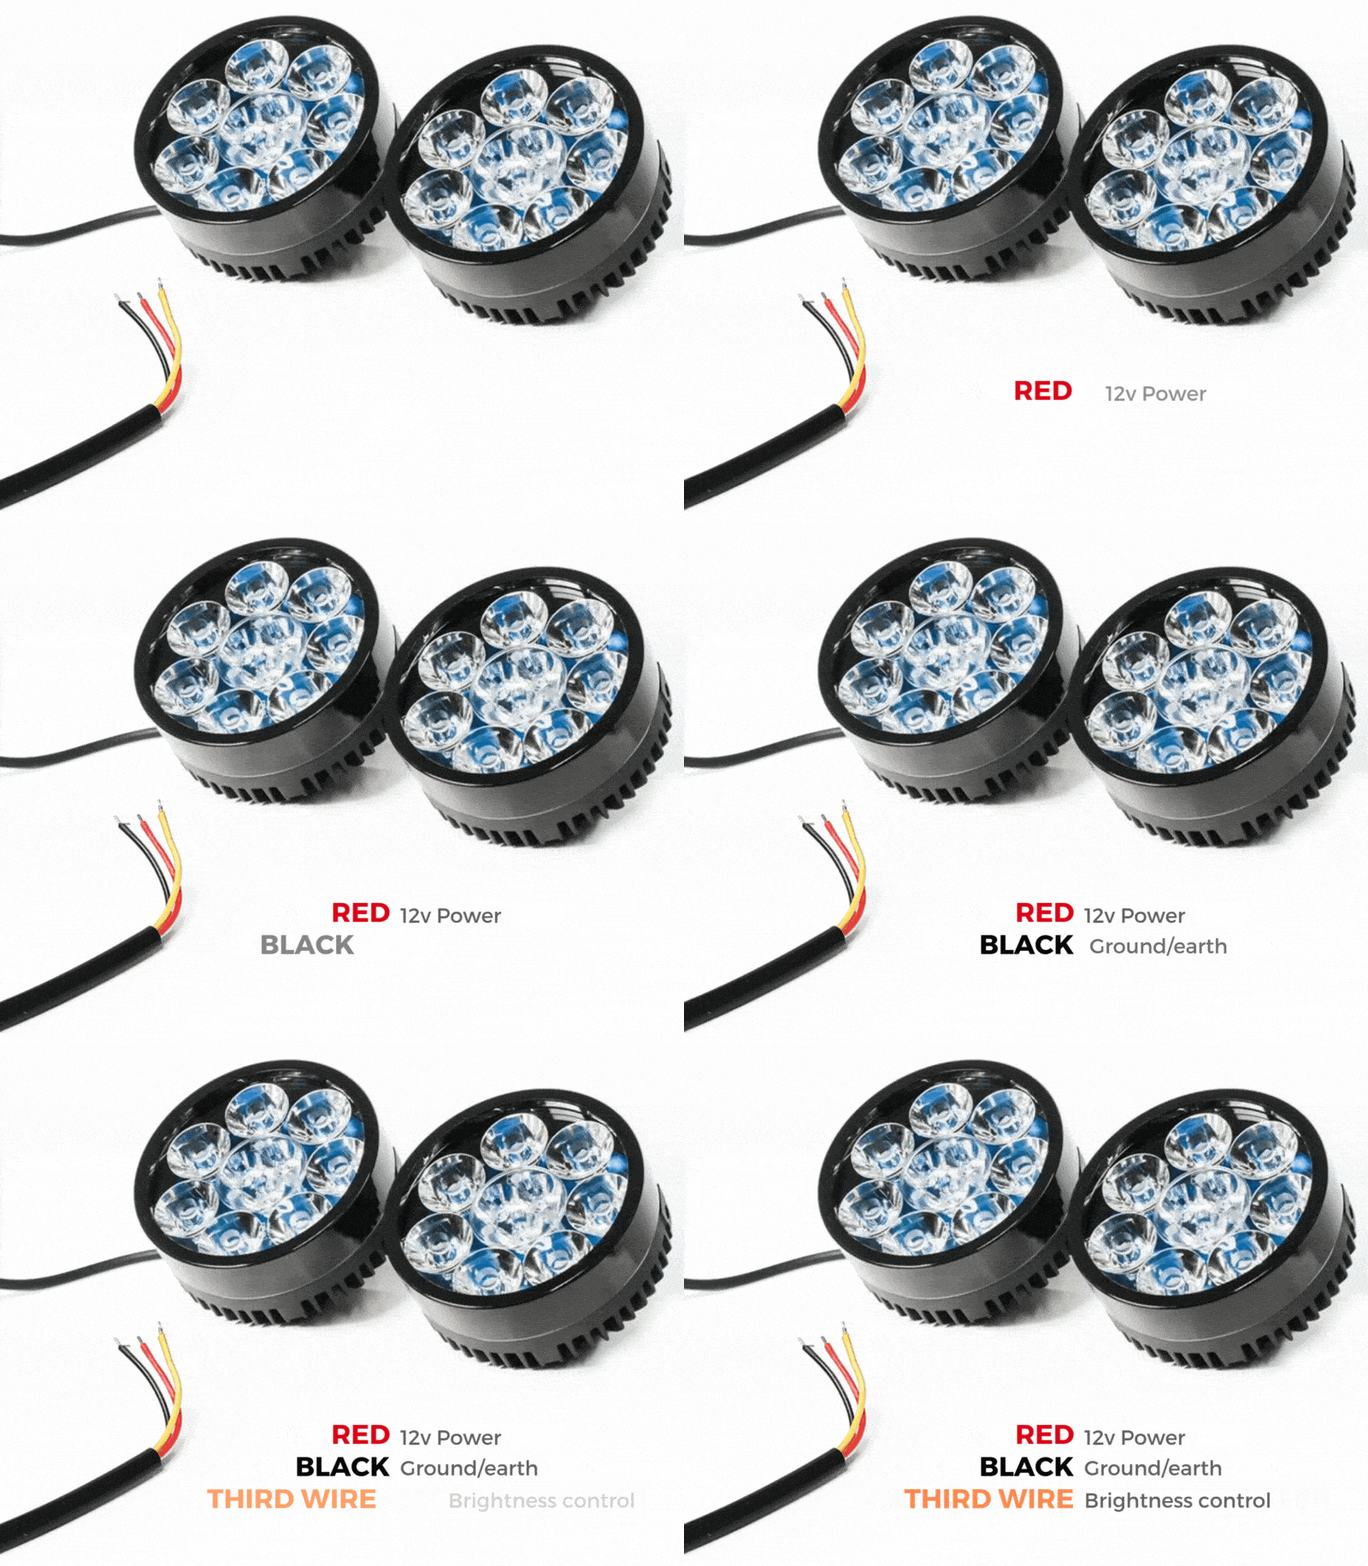
Si el accesorio que se va a conectar a un circuito de alimentación tiene tres cables, convierta un conector de dos cables en un conector de tres cables, tal y como se muestra en la sección «Conexión de luces LED de 3 cables» del manual de usuario de HEX ezCAN (que se puede descargar aquí).
Si el accesorio que se va a conectar a un circuito de alimentación tiene dos cables, selle la cavidad del terminal vacío del conector corto tal y como se muestra en la sección «Conexión de accesorios de 2 cables» del Manual del usuario de HEX ezCAN.
Si no se va a utilizar alguno de los circuitos de alimentación del HEX ezCAN, recomendamos conectar un tapón ciego al conector de salida de cada circuito no utilizado.
2-wire applications: insert a blanking seal.
3-wire applications: insert a PWM terminal wire.
Conecte el terminal macho de cada conector corto al conector hembra HEX ezCAN del circuito de alimentación correspondiente (abajo).
Conexión de un accesorio de 2 cables a un conector HEX ezCAN:
Conexión de un accesorio de 3 cables a un conector HEX ezCAN:
Conexión de accesorios inteligentes de bajo consumo a un circuito eléctrico:
Si va a instalar accesorios «inteligentes» (es decir, accesorios de bajo consumo capaces de realizar entradas y controles inteligentes a través del bus LIN del HEX ezCAN), tenga en cuenta lo siguiente:
Lea las secciones «HEX ezBUS» y «Configuración de la funcionalidad HEX ezBUS» del manual del usuario de HEX ezCAN (que puede descargarse aquí) para obtener información detallada sobre cómo utilizar la funcionalidad ezBUS.
IMPORTANT: if the white circuit is set to ezBUS mode, its fuse trip limit is set to 15 Amps by default. If needed, the ezBUS PWR function can be used to increase the white circuit’s current capacity to a maximum of 30 Amps in ezBUS mode. See the relevant section of the HEX ezCAN User Manual (downloadable from here) for details.
IMPORTANTE: Si los conectores accesorios incluidos en el kit de instalación de HEX ezCAN no tienen cables de alimentación naranjas, sino que tienen colores que coinciden con los colores de los circuitos de alimentación de ezCAN (como se ve a continuación), conecte siempre los cables del mismo color (el conector rojo al circuito de alimentación rojo, el conector azul al circuito de alimentación azul, y así sucesivamente).
El kit de extensión HEX ezCAN contiene todo lo necesario para conectar luces auxiliares delanteras, luces accesorias traseras y una bocina al HEX ezCAN. También incluye conectores adicionales que permiten conectar otros accesorios.
Tidy the input harness, accessory wiring and battery cable routing, making sure you have easy access to the four power circuit plugs.
Fije todos los cables sueltos con las bridas incluidas en el kit de instalación HEX ezCAN.
Complete la instalación de HEX ezCAN de la siguiente manera:
To be able to operate the HEX ezCAN PURE and connected accessories in the way you want to, you must now adjust the input circuit parameters, and device configuration settings.
To learn how to do this, see the HEX ezCAN PURE Device Configuration page.
ADVERTENCIA: Pruebe y compruebe sus instalaciones y accesorios en un entorno seguro y controlado antes de utilizarlos por primera vez. Se recomienda precaución en todo momento. Se requiere especial atención al probar nuevas funciones o accesorios. Lo hace bajo su propia responsabilidad.
DESCARGO DE RESPONSABILIDAD: HEX Innovate no se hace responsable de ninguna lesión o daño, independientemente de su causa, y todos los productos y servicios se utilizan bajo su propia responsabilidad.
Before finalizing the HEX ezCAN PURE installation, or re-installing any components you may have removed, it is important that you test all newly installed accessories for satisfactory fitment and correct operation.
Many HEX ezCAN PURE-powered accessories can be tested by switching the ignition ON and operating the relevant controls. Exceptions include accessories for which you have enabled the Only on when engine running feature (examples may include Aux 1 lights, Aux 2 lights, MotoLights, and heated clothing). To test these functions, the bike’s engine must be running.
Ahora se le redirigirá a nuestro sitio web principal para que pueda consultar nuestra Política de privacidad.
Ahora se le redirigirá a nuestro sitio web principal para que pueda consultar nuestra información legal.